The Start menu has been an important staple of Windows for decades. After Microsoft changed it in Windows 8, the Start menu is back and improved in Windows 10.
You might not have checked out everything the Start menu can do, or knew that you can customize it. We’ll walk you through this tool and how to make the most of it.
Start Menu Basics
To open the Start menu, simply click the Start button in the bottom-left corner of your screen. You can also press the Windows key on your keyboard instead.
The default Start menu on a fresh Windows 10 installation looks like this:
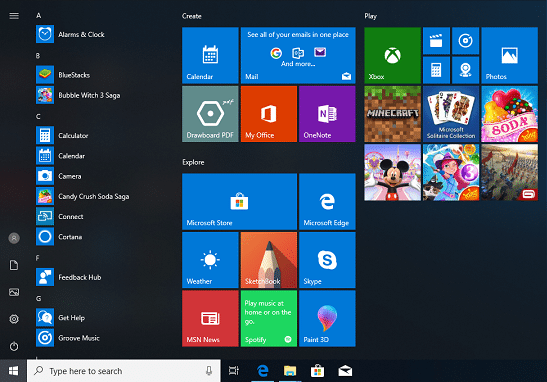
I’ve customized mine a bit by removing some default tiles (as we’ll discuss below). Here’s my Start menu for reference:
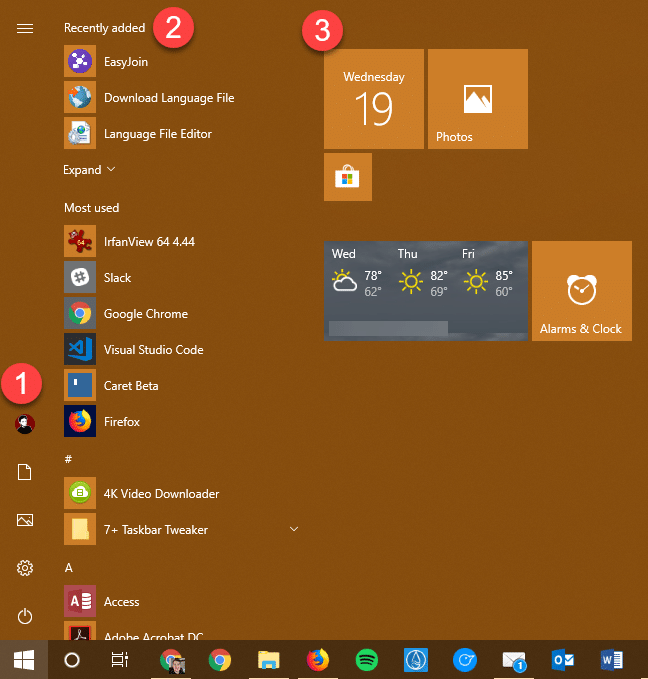
Let’s break it down:
- On the far left of your Start menu, you’ll find quick links to several features. Click your user icon to sign out or switch accounts. Below this, you’ll see quick links to your Documents and Pictures folders, plus a shortcut to the Settings app. Finally, the Power button lets you shut down, restart, and more.
- To the right of this is a long vertical list of your installed programs. This shows software you’ve recently installed at the top, follow by your most-used apps. Below these, you’ll find everything installed in alphabetical order.
- The right side of the Start menu holds tiles and shortcuts. Here you can add quick links to your most-used apps, set live tiles for Store apps, and similar. We’ll discuss this below.
Microsoft tweaks Windows 10 with every major update, so this may look slightly different in the future.
Start Menu Settings
Windows 10 lets you change a few behaviors of the Start menu. You can access these by opening the Settings app and browsing to Personalization > Start.
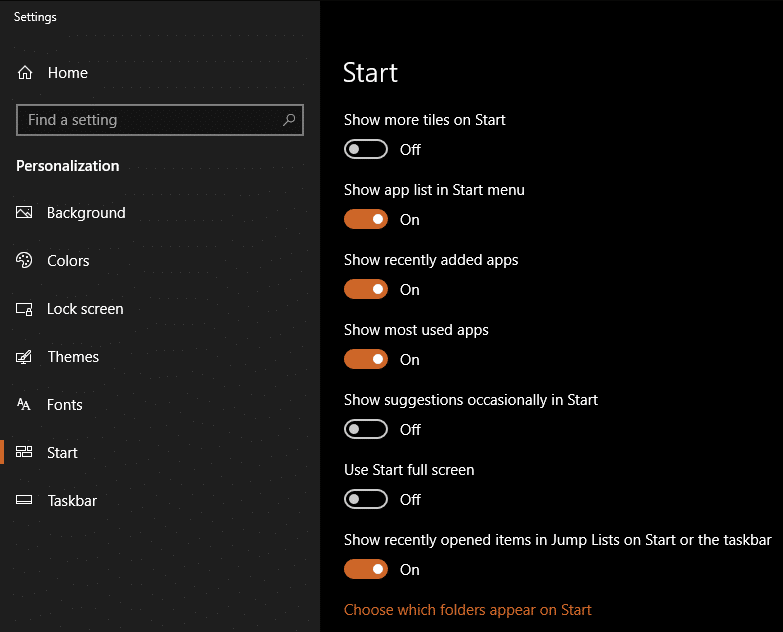
Here, you’ll find options to hide the recently added and most used app sections described above. If you like, you can also disable Show app list in Start menu entirely. This puts the app list on a separate tab from the tiles, making for a slimmer Start menu.
Enable Show more tiles on Start if you’d like more room — though you can also click and drag the Start menu to add space. If you miss Windows 8’s Start Screen, toggle on Use Start full screen for a similar experience.
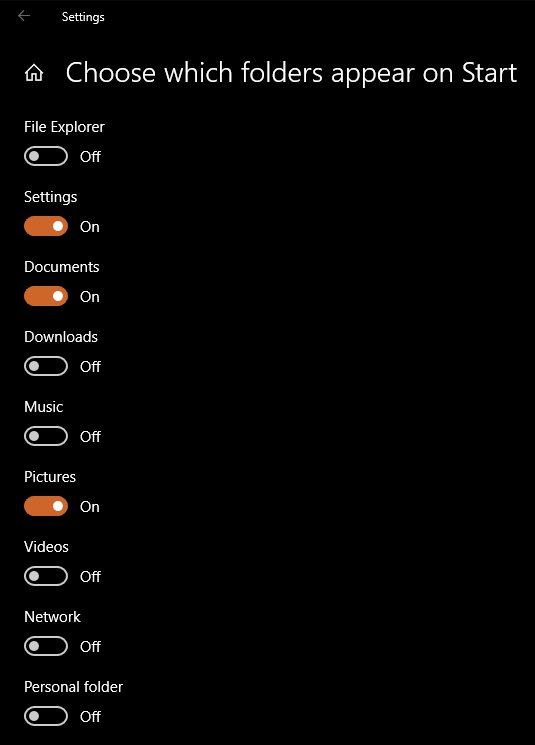
We recommend you turn off Show suggestions occasionally in Start, which is essentially just an option for Microsoft to show ads. Finally, you can click Choose which folders appear on Start to hide the default links to Documents, Pictures, and Settings and add links to File Explorer, Downloads, Music, and more in their place.
Interacting With the Start Menu
You can take a few actions with apps on the Start menu. Right-click on one, and you’ll see a few options depending on the app.
Choose Pin to Start to add a shortcut to that app to the tiles section of the menu. You can also Uninstall most apps apps you don’t want right from the app list.
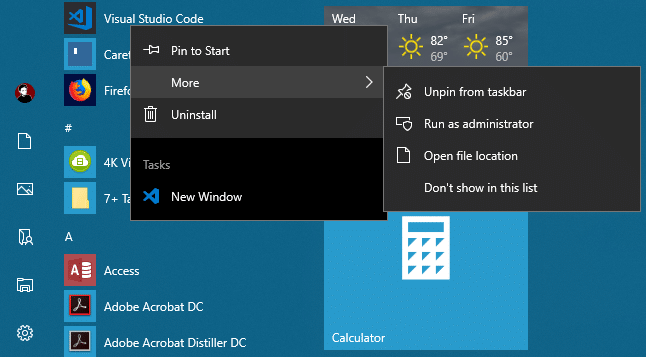
If you right-click a Store app, you’ll see App settings under More. This lets you toggle behavior like running in the background.
Customizing Start Menu Tiles
Start menu tiles are great for pinning shortcuts, and some can use a feature called “live tiles”. Many Store apps allow you to view content from them without even opening the app.
To try this, look through the list for a Store app. Many default Windows 10 apps will work with this, such as Weather, Maps, and Calculator. Right-click it and choose Pin to Start or drag it to the tile area to create a shortcut. Likewise, right-click an existing tile and choose Unpin from Start to remove it.
Next, right-click the new shortcut and choose More > Turn Live Tile on. This will activate the functionality for that tile. For example, Weather will show the forecast for your current location, while Mail can show you a preview of your inbox.
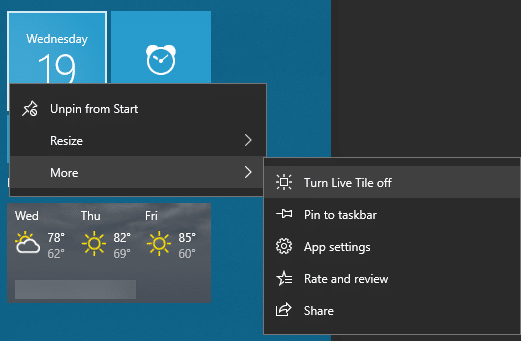
Right-click a tile and choose Resize to pick from four sizes. This can affect how much information shows up in the live tile. Click and drag tiles around freely to arrange them how you like.
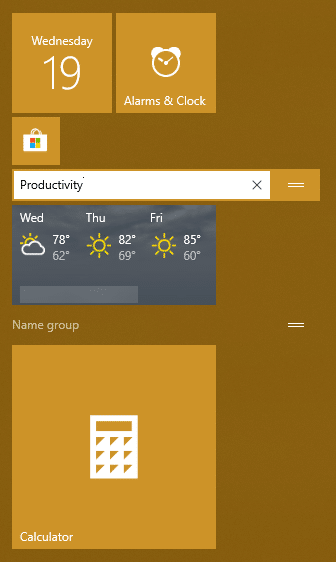
And when you mouse over the space between groups, you can enter a name for that group of tiles. The small handle lets you move the entire group at once. If you need more space, just mouse to the edge of the Start menu and drag it around.
The Start Menu Can Be Colorful
We’ve introduced you to what the Start menu can do and how to customize it for your needs. There’s one more small tweak you might want to make: changing the color of your Start menu.
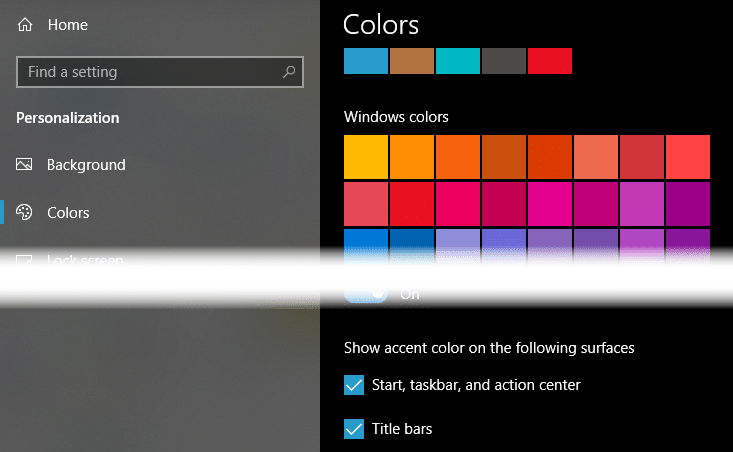
Head to Settings > Personalization > Colors and you can pick a color (or inherit one based on your wallpaper). Below this, make sure you have the Start, taskbar, and action center box checked so the color shows on your Start menu.
With the right shortcuts and tiles, your Start menu will become an asset to your productivity.


