

Most people use Microsoft Word at least occasionally, and while the basics are easy enough to understand, Word hides a lot of functionality that you might not know about.
Let’s highlight some of the useful Word features you may not have discovered yet.
1. Useful Options on the Right-Click Menu
As you’re working on your document, you might come across a phrase you want to rewrite, a word you want to research, or similar. Did you know that Word includes handy tools for these and other tasks right on its right-click menu?
Highlight a word, then right-click to find these handy options on the menu:
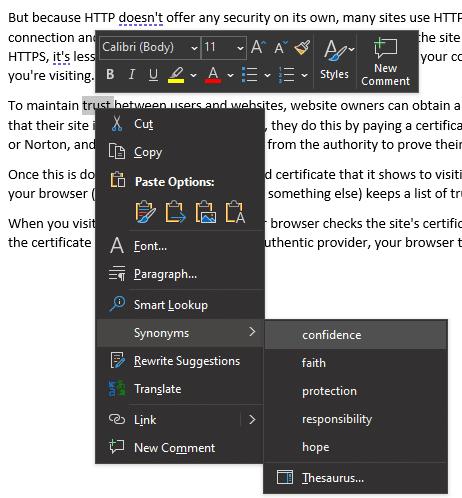
- Smart Lookup: Opens a panel on the right side of the screen that defines the word, as well as showing web and images results for it via Bing.
- Synonyms: Helps you find another word that means almost the same as your highlighted word. This is helpful in situations where you don’t want to use the same word multiple times in close proximity.
- Rewrite Suggestions: Highlight a short phrase and this will give you suggestions on how to reword it. For example, it might suggest “Let’s take a look at” instead of “Let’s look at”.
- Translate: Need to translate a foreign word in a document or want to add a quick translation for readers in another language? This lets you do that without leaving Word.
2. Hide Text
Hidden text in Word isn’t secure, as anyone who knows what they’re doing can unhide it. But it still has many uses: you can create a quiz and hide answers, use hidden text to modify the text layout if you can’t get it to work otherwise, or temporarily remove some text to see what your document looks like without it.
To hide text, first highlight whatever you want hidden. Then click the Font option on the right-click menu (or press Ctrl + D) to open the Font dialog box, which has many options for adjusting your chosen text.
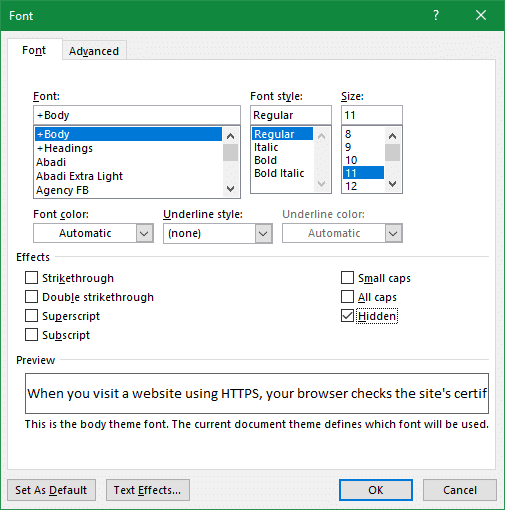
Simply check the Hidden box in the Effects section and choose OK, then the text will disappear. To easily show hidden text again, press Ctrl + A to select the whole document, then repeat the above process to clear the Hidden checkbox.
If you want hidden text to show up when you print a document, you’ll need to visit File > Options > Display and check the Print hidden text box. This will show hidden text with an underline in the print preview.
3. Change Proofreading Options
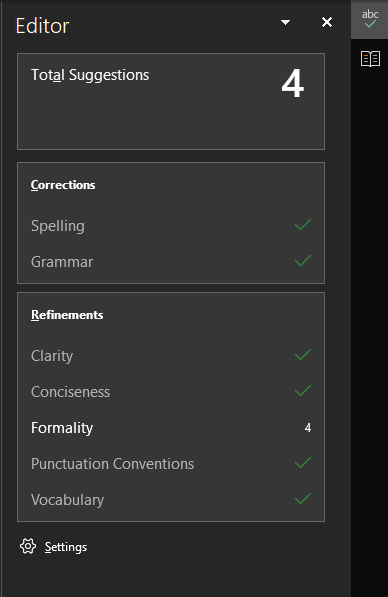
Word checks for a lot of spelling and grammar mistakes by default, but you can change what it looks for if you want to work on specific areas of your writing. To get an idea of what Word thinks of your document, open the Review tab at the top and click the Editor button in the Proofing section. This will open a menu on the right where you can see the areas that need improvement, such as Spelling, Clarity, and Vocabulary.
Click the Settings gear at the bottom of this page, or go to File > Options > Proofing, to change how Word corrects your work. Most people won’t want to change the default options in the main pane.
The more interesting options are found by clicking Settings next to Writing Style under the When correcting spelling and grammar in Word section. Here you can adjust the specific points that Word looks at, broken down by category.
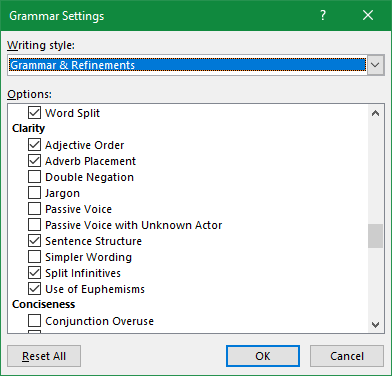
A few highlights include:
- Jargon: Word will let you know if you use specific wording that the average person won’t recognize.
- Passive voice: If you’re working on using more active voice, enable this to catch passive voice.
- Words Expressing Uncertainty: Removing phrases like “it seems” and “supposedly” from your writing make it stronger.
- Space between sentences: You can have Word check to make sure all sentences have one or two spaces after the period. This is a more convenient alternative to doing a find/replace for a double-space on your own.
- Region-Specific Words: If people outside your country read your work, enabling this can help you avoid phrases they may not be familiar with.
4. Make Proper Use of Headers
For a simple document, you probably don’t worry much about headers. But for any kind of longer work in Word, they really come in handy. Not only do they make your work easier to follow visually, but they also make it simple to utilize other Word functions.
For example, on the Navigation pane (which you can open by pressing Ctrl + F), select the Headings option to easily jump around your document by the headers. Not only does this make it easy to browse the layout of your document at a glance, but you can manage their content without messing with the actual text in the document.
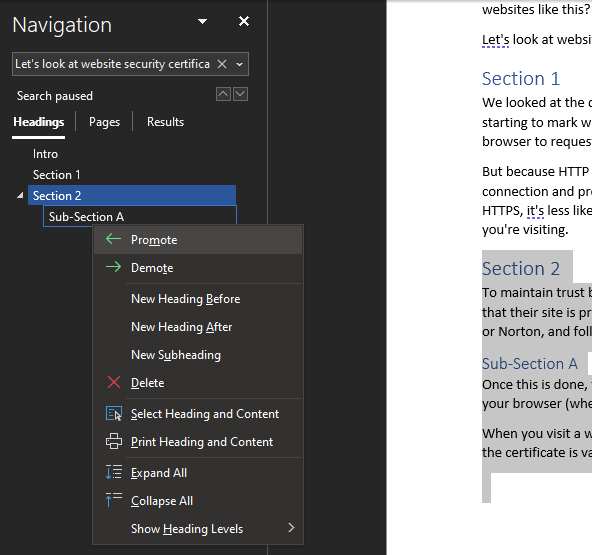
Click and drag these sections to move their content in your document around, or right-click a section to add a new heading before or after it. This is extremely handy for documents where you don’t want to mess up specific formatting when making changes.
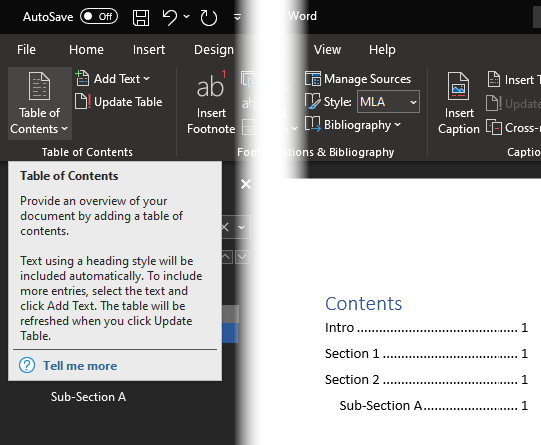
Sections also make it easy to insert a table of contents into your document. On the References tab, click Table of Contents to choose a style and insert the contents into your document automatically. If you make changes to section headers in the future, just click Update Table to add the new content in.
Making the Most of Word
These are just a few of Word’s features that you might have missed out on. Word packs a ton of functionality, and nobody really needs all of it at once. But knowing tips like this can save you time working with Word in the future, as well as exposing you to more of its capabilities as you navigate the menus.
For more like this, we’ve taken a look at other Word tips for better productivity.