Having trouble with your sound input in Windows is extremely frustrating, especially if you frequently join video calls. Thankfully, computer microphone problems usually come down to a few common causes.
Let’s look at how to figure out what’s wrong with your microphone in Windows 10 and get it working again. Like all troubleshooting, it’s a good idea to restart your PC first to rule out any temporary issues.
Start With Sound Settings in Windows
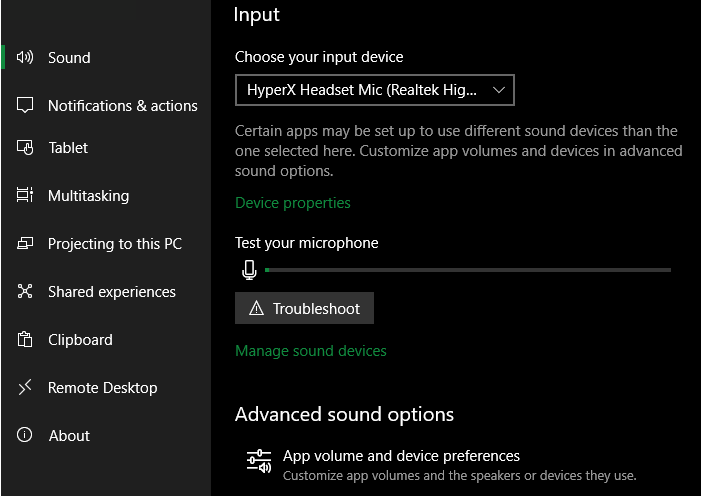
First, you should head to Settings > System > Sound to make sure Windows is picking up your mic properly. On this page, scroll down to Input and make sure you have the right device chosen under Choose your input device.
You might see multiple options if you have more than one microphone connected, such as a headset mic and a microphone in your webcam. If you don’t see your microphone, click the Manage sound devices link, scroll to the bottom of that page, and see if it’s in the Disabled section. If so, click it and choose Enable to make it usable again.
With your mic selected, you should see a Test your microphone field below it. If you don’t see this, click the Device properties and test microphone link. Speak into your microphone, and the bar should move with the sound level.
If you don’t get any movement, select Troubleshoot and Windows will run a scan to hopefully fix the problem. In case this doesn’t work, continue on for more tips.
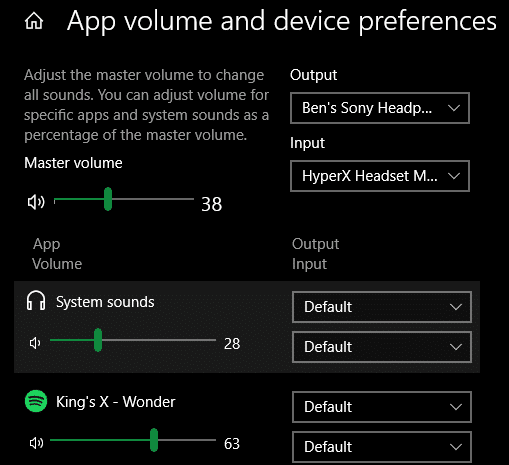
While in this panel, you should also open the App volume and device preferences section at the bottom. Here, you can select a different input and output device for each app that’s running. Double-check this to be sure you haven’t set one app to use the wrong microphone.
Check Your Audio Hardware
If Windows doesn’t show your microphone in the above menus or you can’t get any sound from it, you should next make sure all the physical components are working properly.
Double-check that the cable going from your microphone to your PC is inserted firmly. Unplug the cable and plug it back in to make sure it isn’t loose. Also confirm that your cable is free of damage, and isn’t fraying or cracked anywhere.
Analog microphones should be plugged into the pink port in the group of audio inputs on the back of your PC. If you’re using a USB microphone or headset, try using a different USB port.
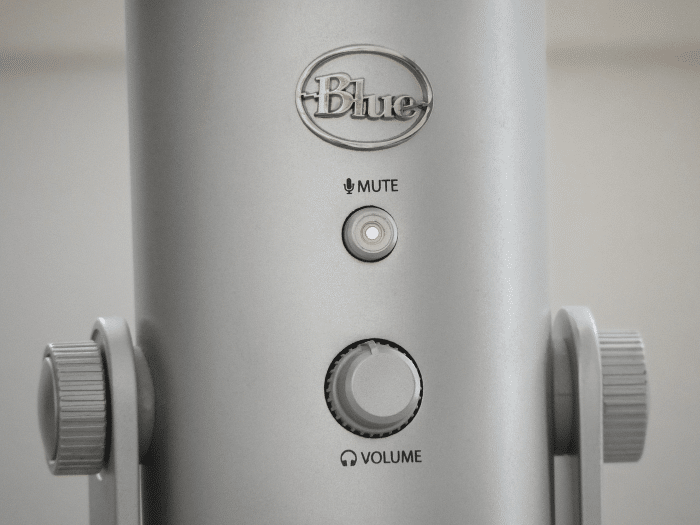
Another common mistake is leaving the physical mute switch on your device enabled. Look for a slider on the cord of headsets or a button on a dedicated microphone to make sure you don’t have the input muted there.
Most microphones shouldn’t require special drivers to work properly, but it’s still worth heading to Settings > Update & Security > Windows Update to check for driver updates. If that doesn’t find any, you can also check the manufacturer’s website for the latest drivers.
Review Microphone Privacy Settings
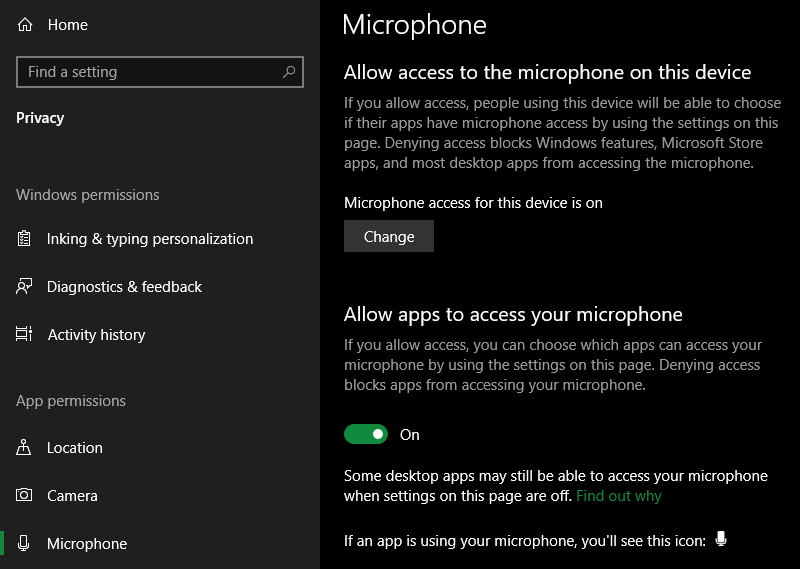
In the Privacy panel of the Settings app, you can prevent apps from accessing your microphone. This could be the root cause of your issue.
Head to Settings > Privacy > Microphone to review these options. First, make sure Microphone access for this device is on shows at the top. If it doesn’t, click Change to grant permission.
Next, you’ll see the Allow apps to access your microphone section. There’s a master toggle at the top, followed by a list of apps that you can allow or deny access for. These are all Microsoft Store apps, not traditional desktop programs, so you should check them if you use apps from the Store.
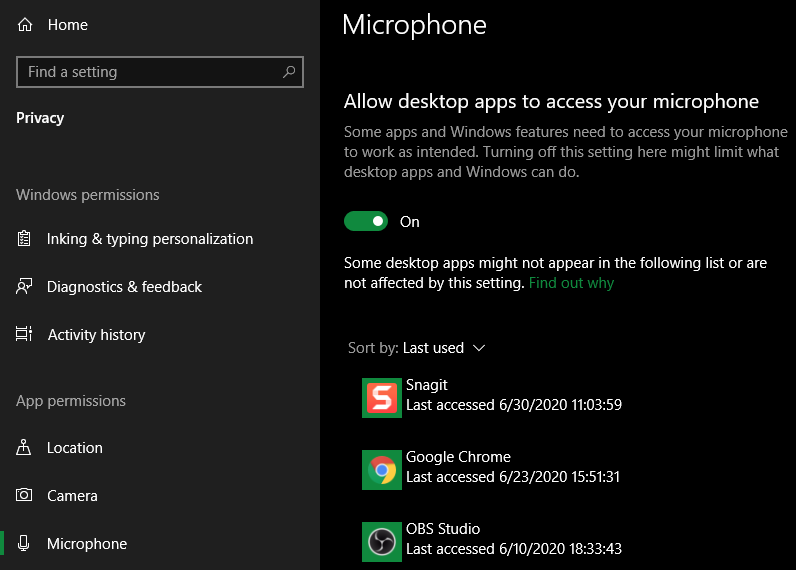
Finally, you’ll see Allow desktop apps to access your microphone. There’s only one toggle here, followed by a list of desktop apps that have recently accessed your microphone.
Make sure the toggle isn’t turned off, then take a look to see if the app you’re trying to use is listed as recently having access. This lets you know if the app is actually detecting your mic or not.
Check Control Panel Sound Options
Continuing on, you should next look in the Control Panel, which has a few additional sound options compared to Settings. You’ll find a quick link to Sound Control Panel on the right side of Settings > System > Sound.
Otherwise, you can access it by typing control panel into the Start menu. If the View by option in the top-right says Categories, change it to Small icons. Select Sound and switch to the Recording tab.
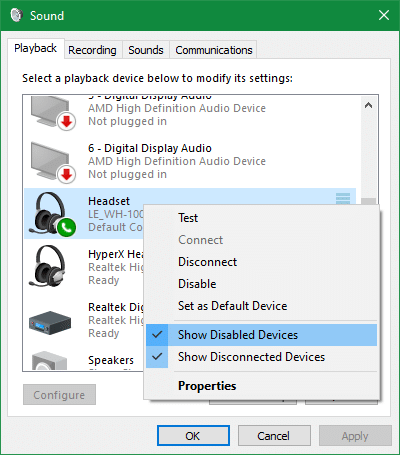
Once you’re here, right-click anywhere inside and make sure both Show Disabled Devices and Show Disconnected Devices are checked. This allows you to see every mic input, even if you disabled it in the past or it’s not currently connected.
Go through the list and make sure your mic isn’t disabled. Right-click and choose Enable if it is. It’s also a good idea to choose Set as Default Device for the input you want to use most of the time. That way, apps know to use it first.
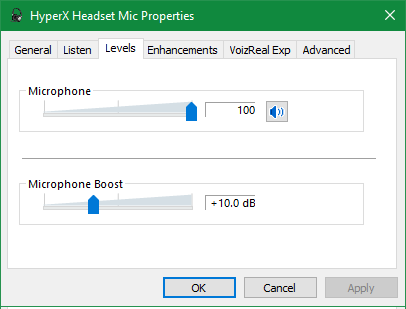
Double-click on a mic to show additional options for it. On the Levels tab, you can adjust the Microphone input volume, as well as Microphone Boost with certain devices.
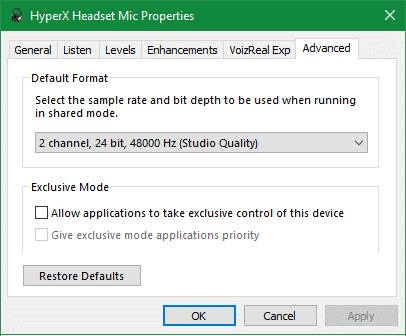
On the Advanced tab, you should disable both options in the Exclusive Mode section. These let one program take full control over your mic, which can cause problems if that app is running when you want to use the mic with something else.
Record a Sample to Test
The above steps should fix any problems with Windows not detecting your microphone or muting input. If you have an issue with your headset cutting out or sounding unclear, you can troubleshoot further by making a short recording.
To do this, open the Voice Recorder app by searching for it on the Start menu. Record 30 seconds to a minute of you speaking, then play it back and see how it sounds.
If everything is clear with the recording, then your problem likely lies with a particular app. But if the recording cuts out or otherwise sounds wrong, your problem probably lies with hardware. Try testing your microphone on another computer to see if it has the same issues.
Adjust Audio Settings in Your App
The final step of microphone troubleshooting lies in checking the audio settings for whatever app you’re using. This is particularly important if you’re only having an issue in one program.
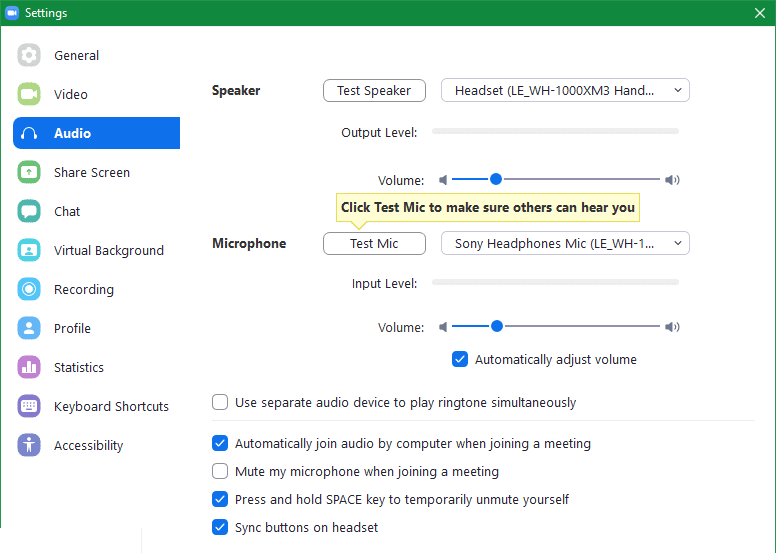
For example, in Zoom, click the Gear icon at the top-right to open its Settings, then switch to the Audio tab on the left. Here you can make sure Zoom is using the right microphone input and click Test Mic to record a short clip to confirm it hears you. Adjust the input volume if it’s too quiet or loud.
This will differ slightly for each app, but most have a similar list of settings. Remember that video call apps usually let you mute yourself using a shortcut key or on-screen button, which you might hit by mistake. Speaking of Zoom, we’ve covered important Zoom security tips you should know.
Can You Hear Me Now?
Now you know what steps to take when your microphone isn’t working in Windows 10 or a particular app. Whether it’s an issue with the hardware or a setting you weren’t aware of, hopefully your microphone is now detected and sounds great.
If you’re still having a problem, there’s a chance that your microphone is no longer working properly, especially if the same issues occur on another computer.
For more Windows tips, check out useful functions you’ll find in the Windows 10 Settings menu.

